11
Jul
Behind the Scenes - Animating a Title
Written by on .
As everyone knows, OpenShot has a new 3D animated title system. However, what you might not know, is exactly how Blender is being used to create these animations. I thought I would explain what goes into creating a new Blender title sequence.
But first, take a look at the newest Blender template I added today. It's quite pretty, and very flexible. As you watch this video, I want you to think about the following question. Can your favorite video editor do this?
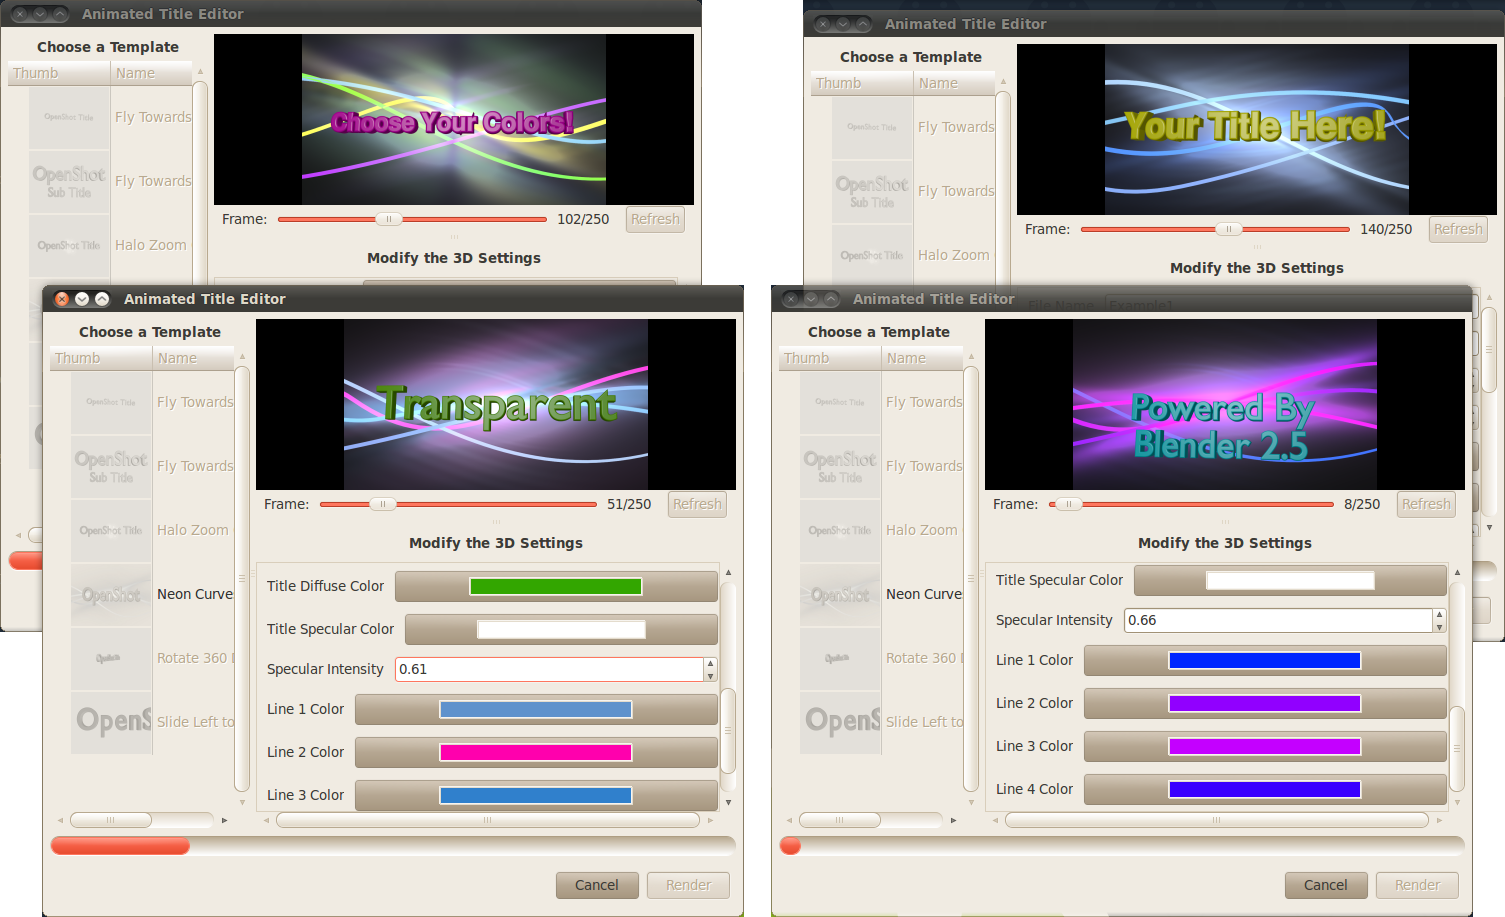
When using OpenShot, the interface is super simple. Take a look at the window I used to create the titles for this video. Each animated curve has a color picker, so adjusting the colors is quick and easy. The glare and lighting in the video are affected by the different colors, so choose wisely, and create your own stunning combination.
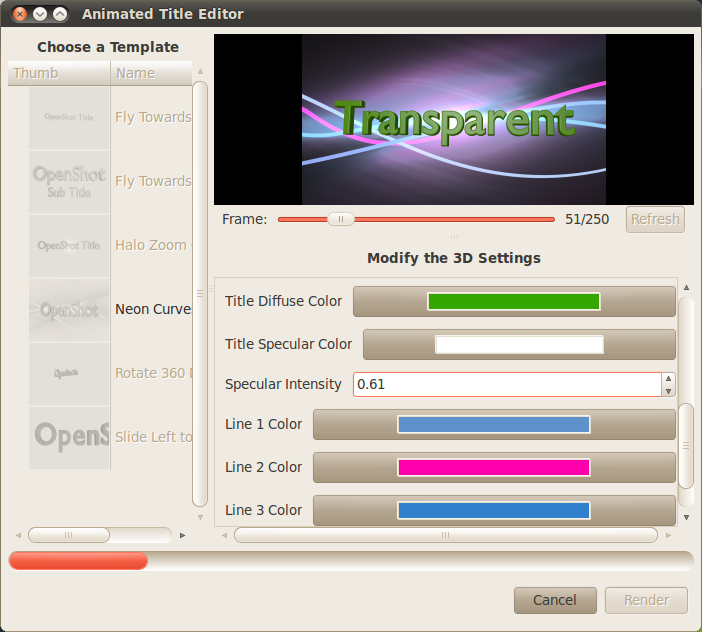
(Click image to enlarge)
So, the first step to creating this Blender template was to install Blender 2.5 (alpha). Once Blender is installed, I modeled a few curves and positioned them in a random fashion in front of the camera. I created a new material for each curve, so that the user can adjust the colors independently. The material also emits light and has no shadows, which helps create the illusion of a "neon" tube.
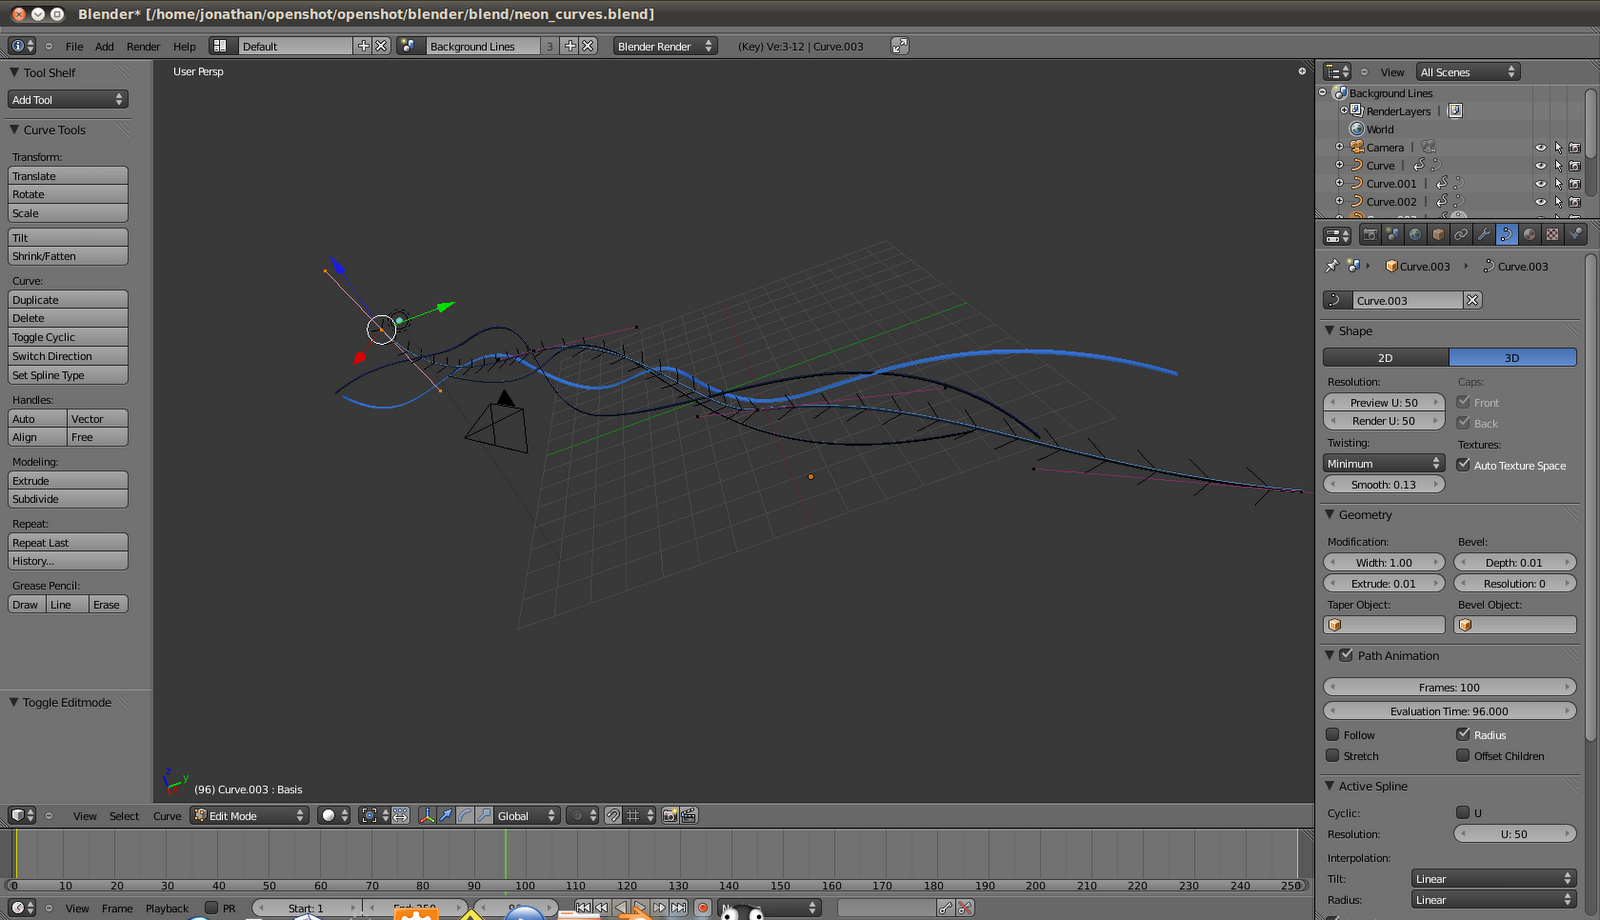
(Click image to enlarge)
Once the scene is modeled, I used the animation system in Blender to key frame a series of movements for the curves. For the most part, each curve is moved from the left to the right over 250 frames. Each key frame is visualized in the IPO curve window, so they can be manually adjusted until the animation feels just right.
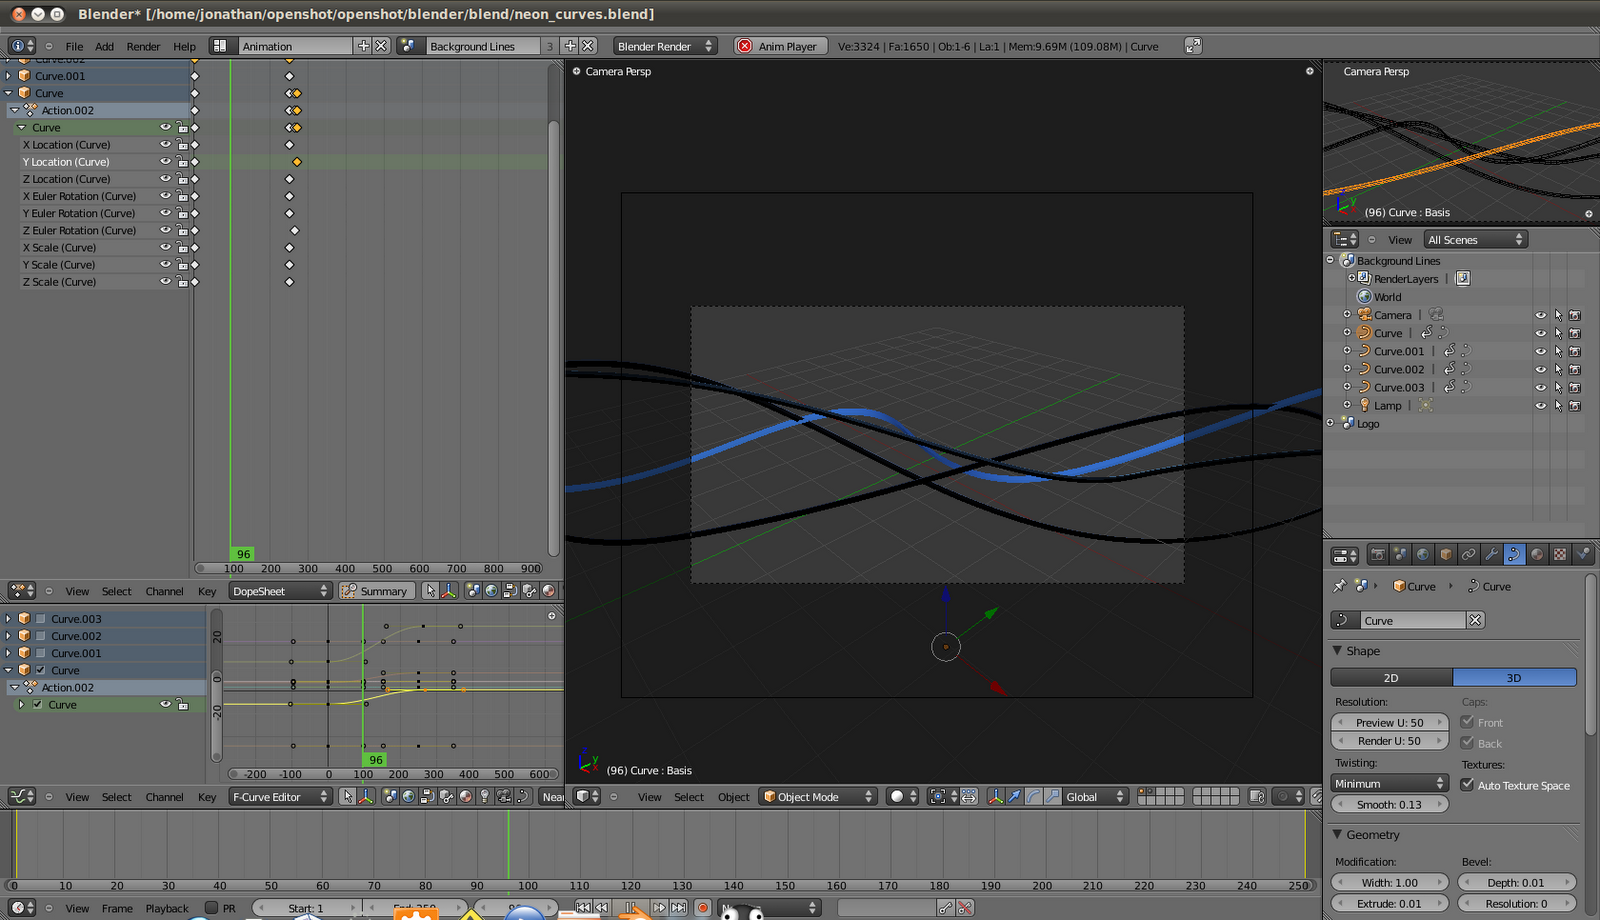
(Click image to enlarge)
Next, I used the composite node editor in Blender to route the output of each frame through a series of nodes. This part can be a bit tricky if you are not familiar with how a node based editing system works. The goal was to take the curves (which are emitting light), and create a glare, which will help sell the idea of "neon" lights. To complicate things, the actual "text" of the title needed to be isolated from this glare, so not to blur the text. So, the text is actually in a different scene, and is combined together in the composite nodes, with some clever routing of the alpha channel.
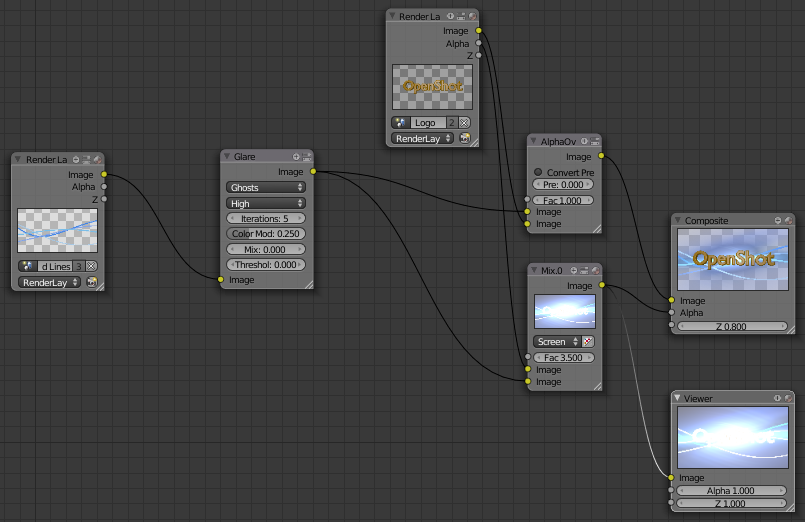
(Click image to enlarge)
The last step was to create an .XML file which explains what "parameters" are available for this template, so that OpenShot can display a simple interface for the user. Most of the templates have a very similar set of parameters, so a little bit of copy & paste, and this step was done. Also, a custom python script needed to be created, which applies the parameters to the actual Blender template. Again, a little copy & paste helped complete this step.
Now it's ready to test and see if it actually works inside OpenShot. One more fun fact... more than 1 title can be created at a time. So, if you have a few different titles that need to be created for a video, they can all be rendering at the same time.
(Click image to enlarge)
Well, that about wraps up this post on how to create a Blender template for OpenShot. If you are serious about contributing title templates, please post them on our forums, and we'll select the coolest ones to include in OpenShot. Don't worry about the .XML and python scripts. Those are easy to create, and I can always assist.